Example Asbestos Removal Projects in Federal Way

Six jobs from around Federal Way, Milton and Fife are laid out here: the building, the lab findings, the method, the number of days and an approximate price. About four in ten Federal Way homes are from before 1980, and many others from the 1980s, so every example starts with a test.

Vaulted popcorn ceiling removed before a house goes on the market

Example project
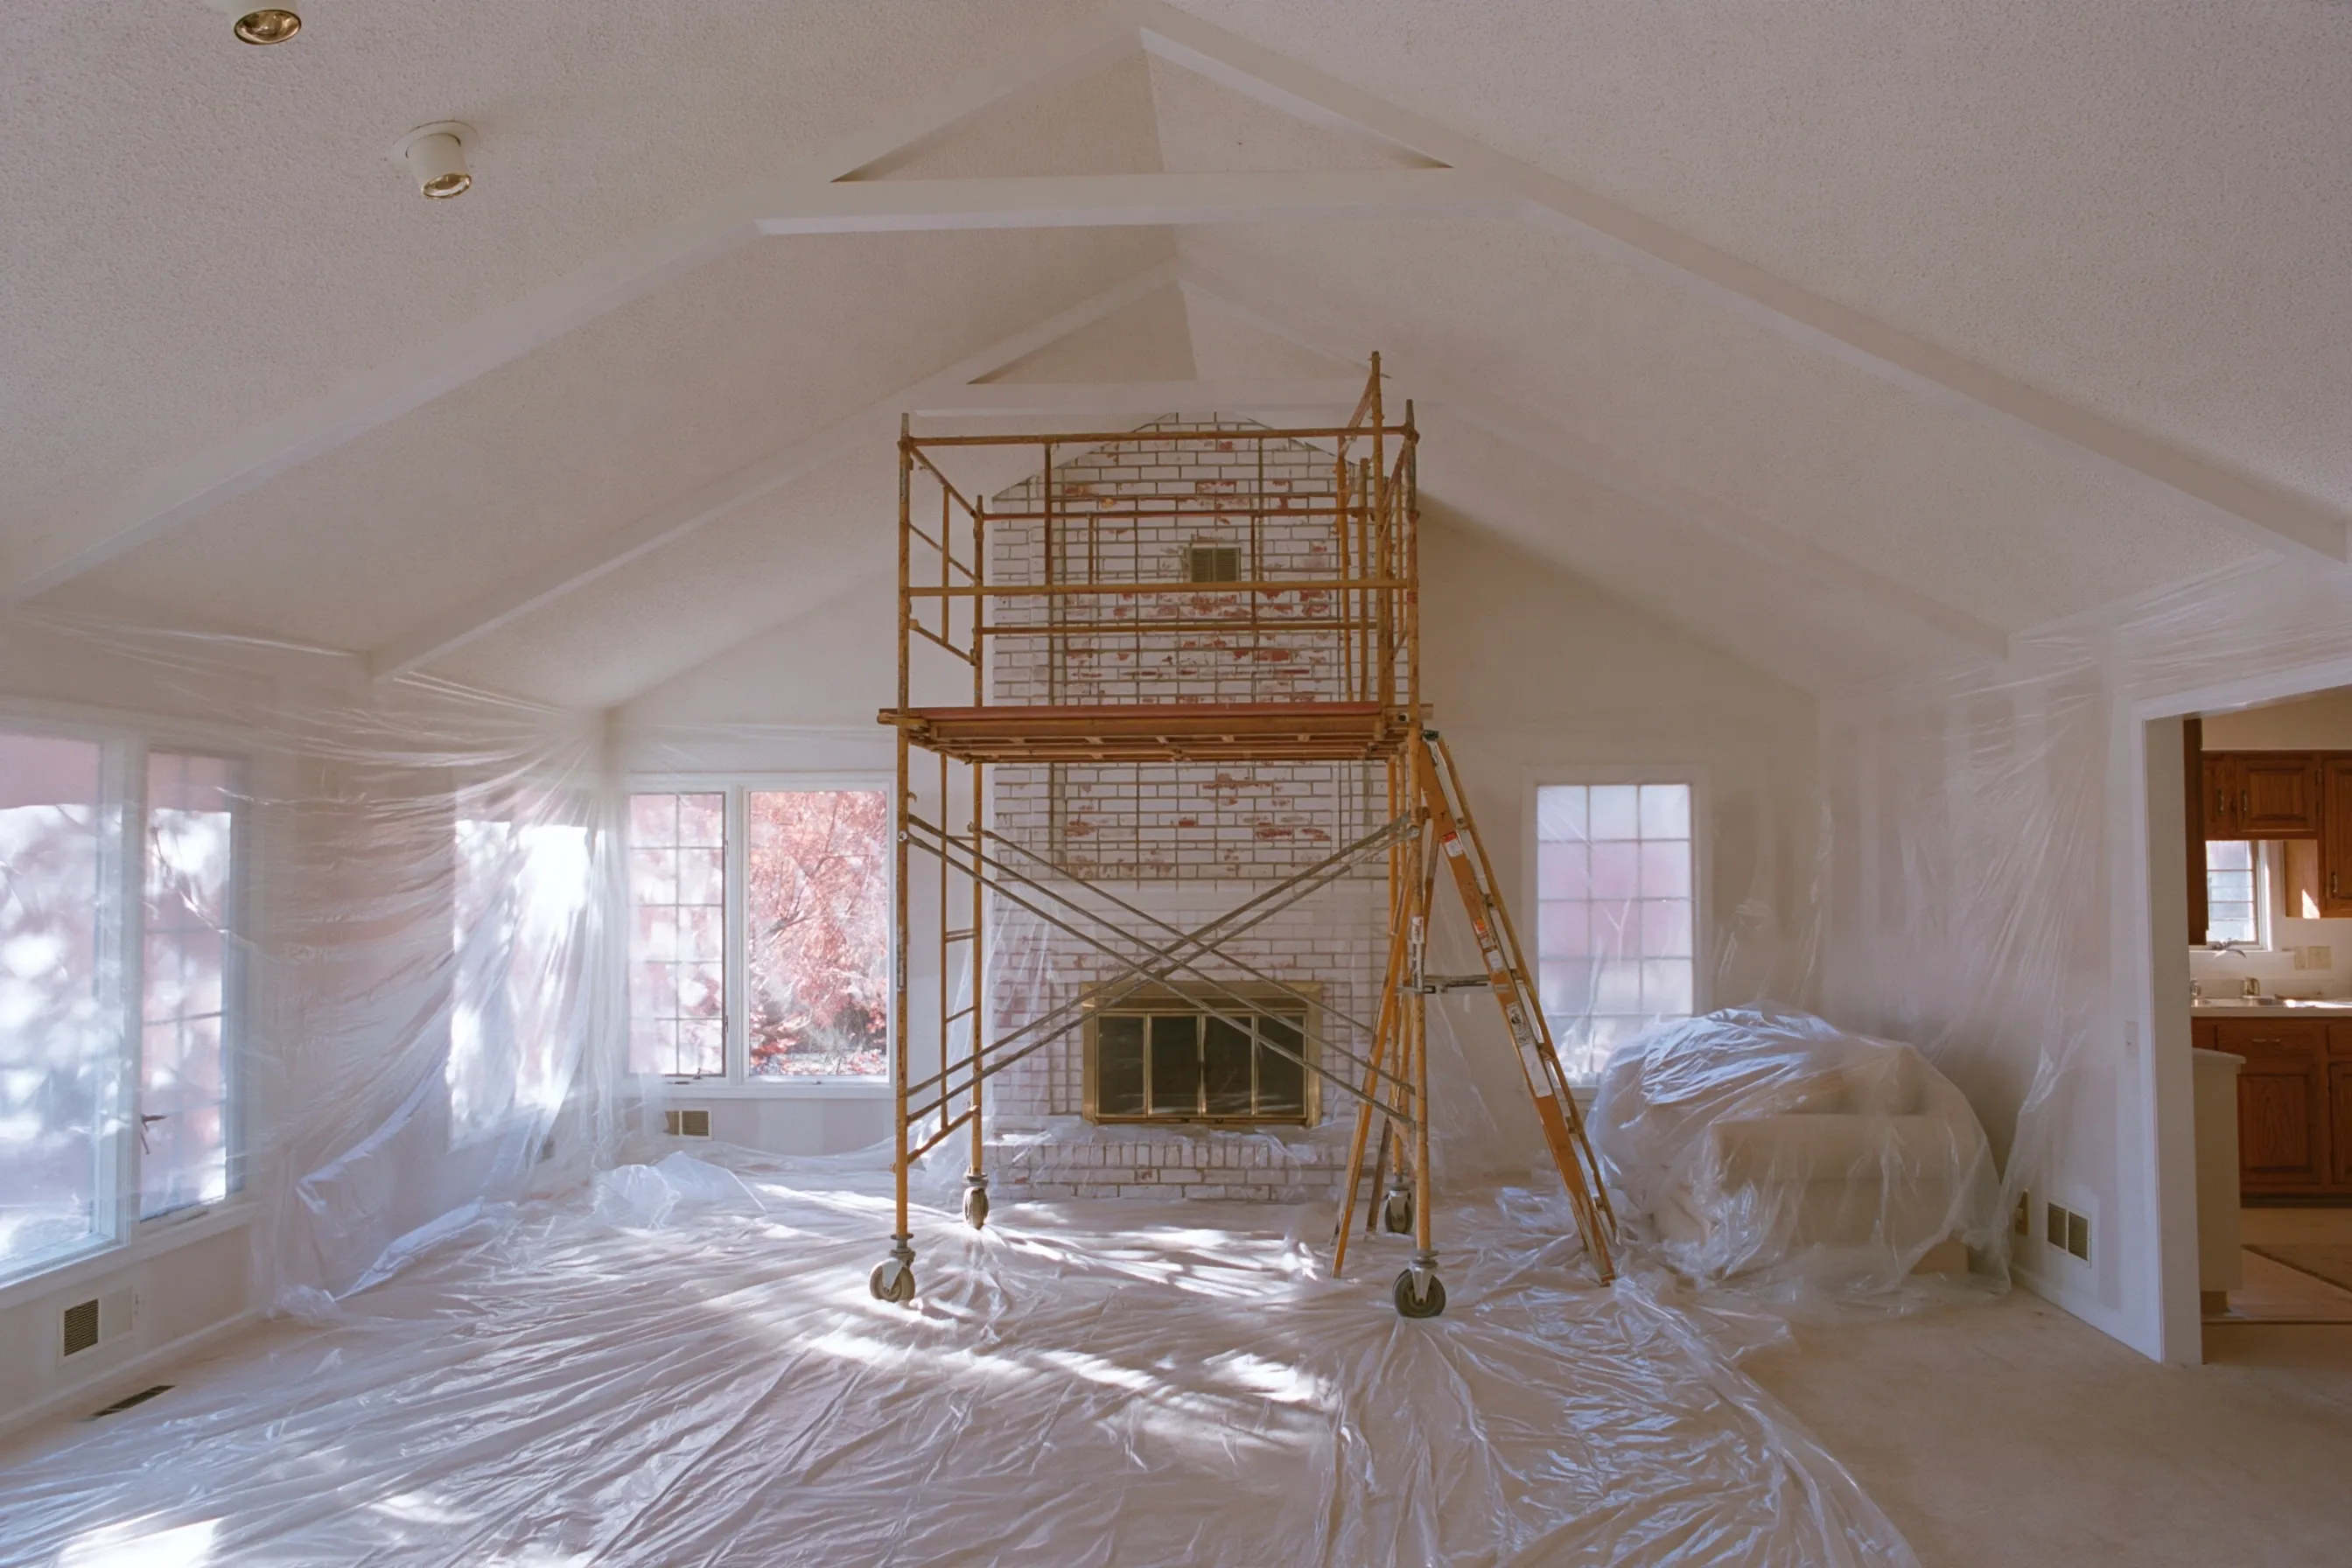
Great room with a high sloped ceiling covered in popcorn texture, scaffolding set up below and the floor and walls under plastic
Home
Early-1980s two-story house in Federal Way
Original request
A smooth vaulted ceiling before the house is listed for sale
Testing
Texture from the vault and from the flat dining ceiling beside it, sampled separately
Found
Asbestos in the vault texture, under two coats of paint; the flat dining ceiling is clear
Area
About 650 sq ft of sloped vaulted living room ceiling, up to 16 ft high
Setup
Scaffold, plastic over the floor and walls and a filtered air unit
Timeline
Agency filing, then most of a week on scaffold
Cost
$9,500

Scope of work

Floors, walls and the stair rail under plastic, scaffold rolled along beneath the vault, the painted texture soaked and scraped in sections into bags, everything vacuumed and wiped, and disposal. The clear dining ceiling stays. The finisher and painter quote the smooth ceiling separately.

Project overview

In this example, the owners of an early-1980s house in Federal Way plan to sell in the spring. The tall vaulted ceiling in the living room is the first thing buyers see, and they want it smooth. The listing agent asks for a test of the vault and of the flat dining ceiling beside it.

The vault is positive, under two coats of paint, and the dining ceiling is clear. The vault is about 650 sq ft and up to 16 ft high, so most of the work is setting up and moving scaffold. After the notice to Puget Sound Clean Air Agency, the painted texture is soaked and scraped in sections. The owners keep the lab report and waste records to show buyers.

The goal

The goal is a smooth-ready vaulted ceiling and the paperwork to show buyers, finished before the house is listed.

Process

  1. Before work Both samples sent; the filing goes in; sofas and the dining table moved to the garage.
  2. Day one Sheeting down, scaffold assembled, work begins at the peak of the vault.
  3. Days two and three The rest of the vault scraped, bags sealed as the work goes.
  4. Last day HEPA clean, a visual check, plastic down; the painter takes over.

Planning right

  • Start early. The painter and the listing photos come after the removal.
  • Keep the lab report and waste records for buyers and their inspector.
  • Paint on the texture slows soaking. Tell the crew how many coats it has had.
  • The stair that meets the vault needs its own plastic wall, so dust cannot reach the bedrooms.
Get a free quoteMore about asbestos popcorn ceiling removal

Cracked cement shingles off the back wall before repainting

Example project

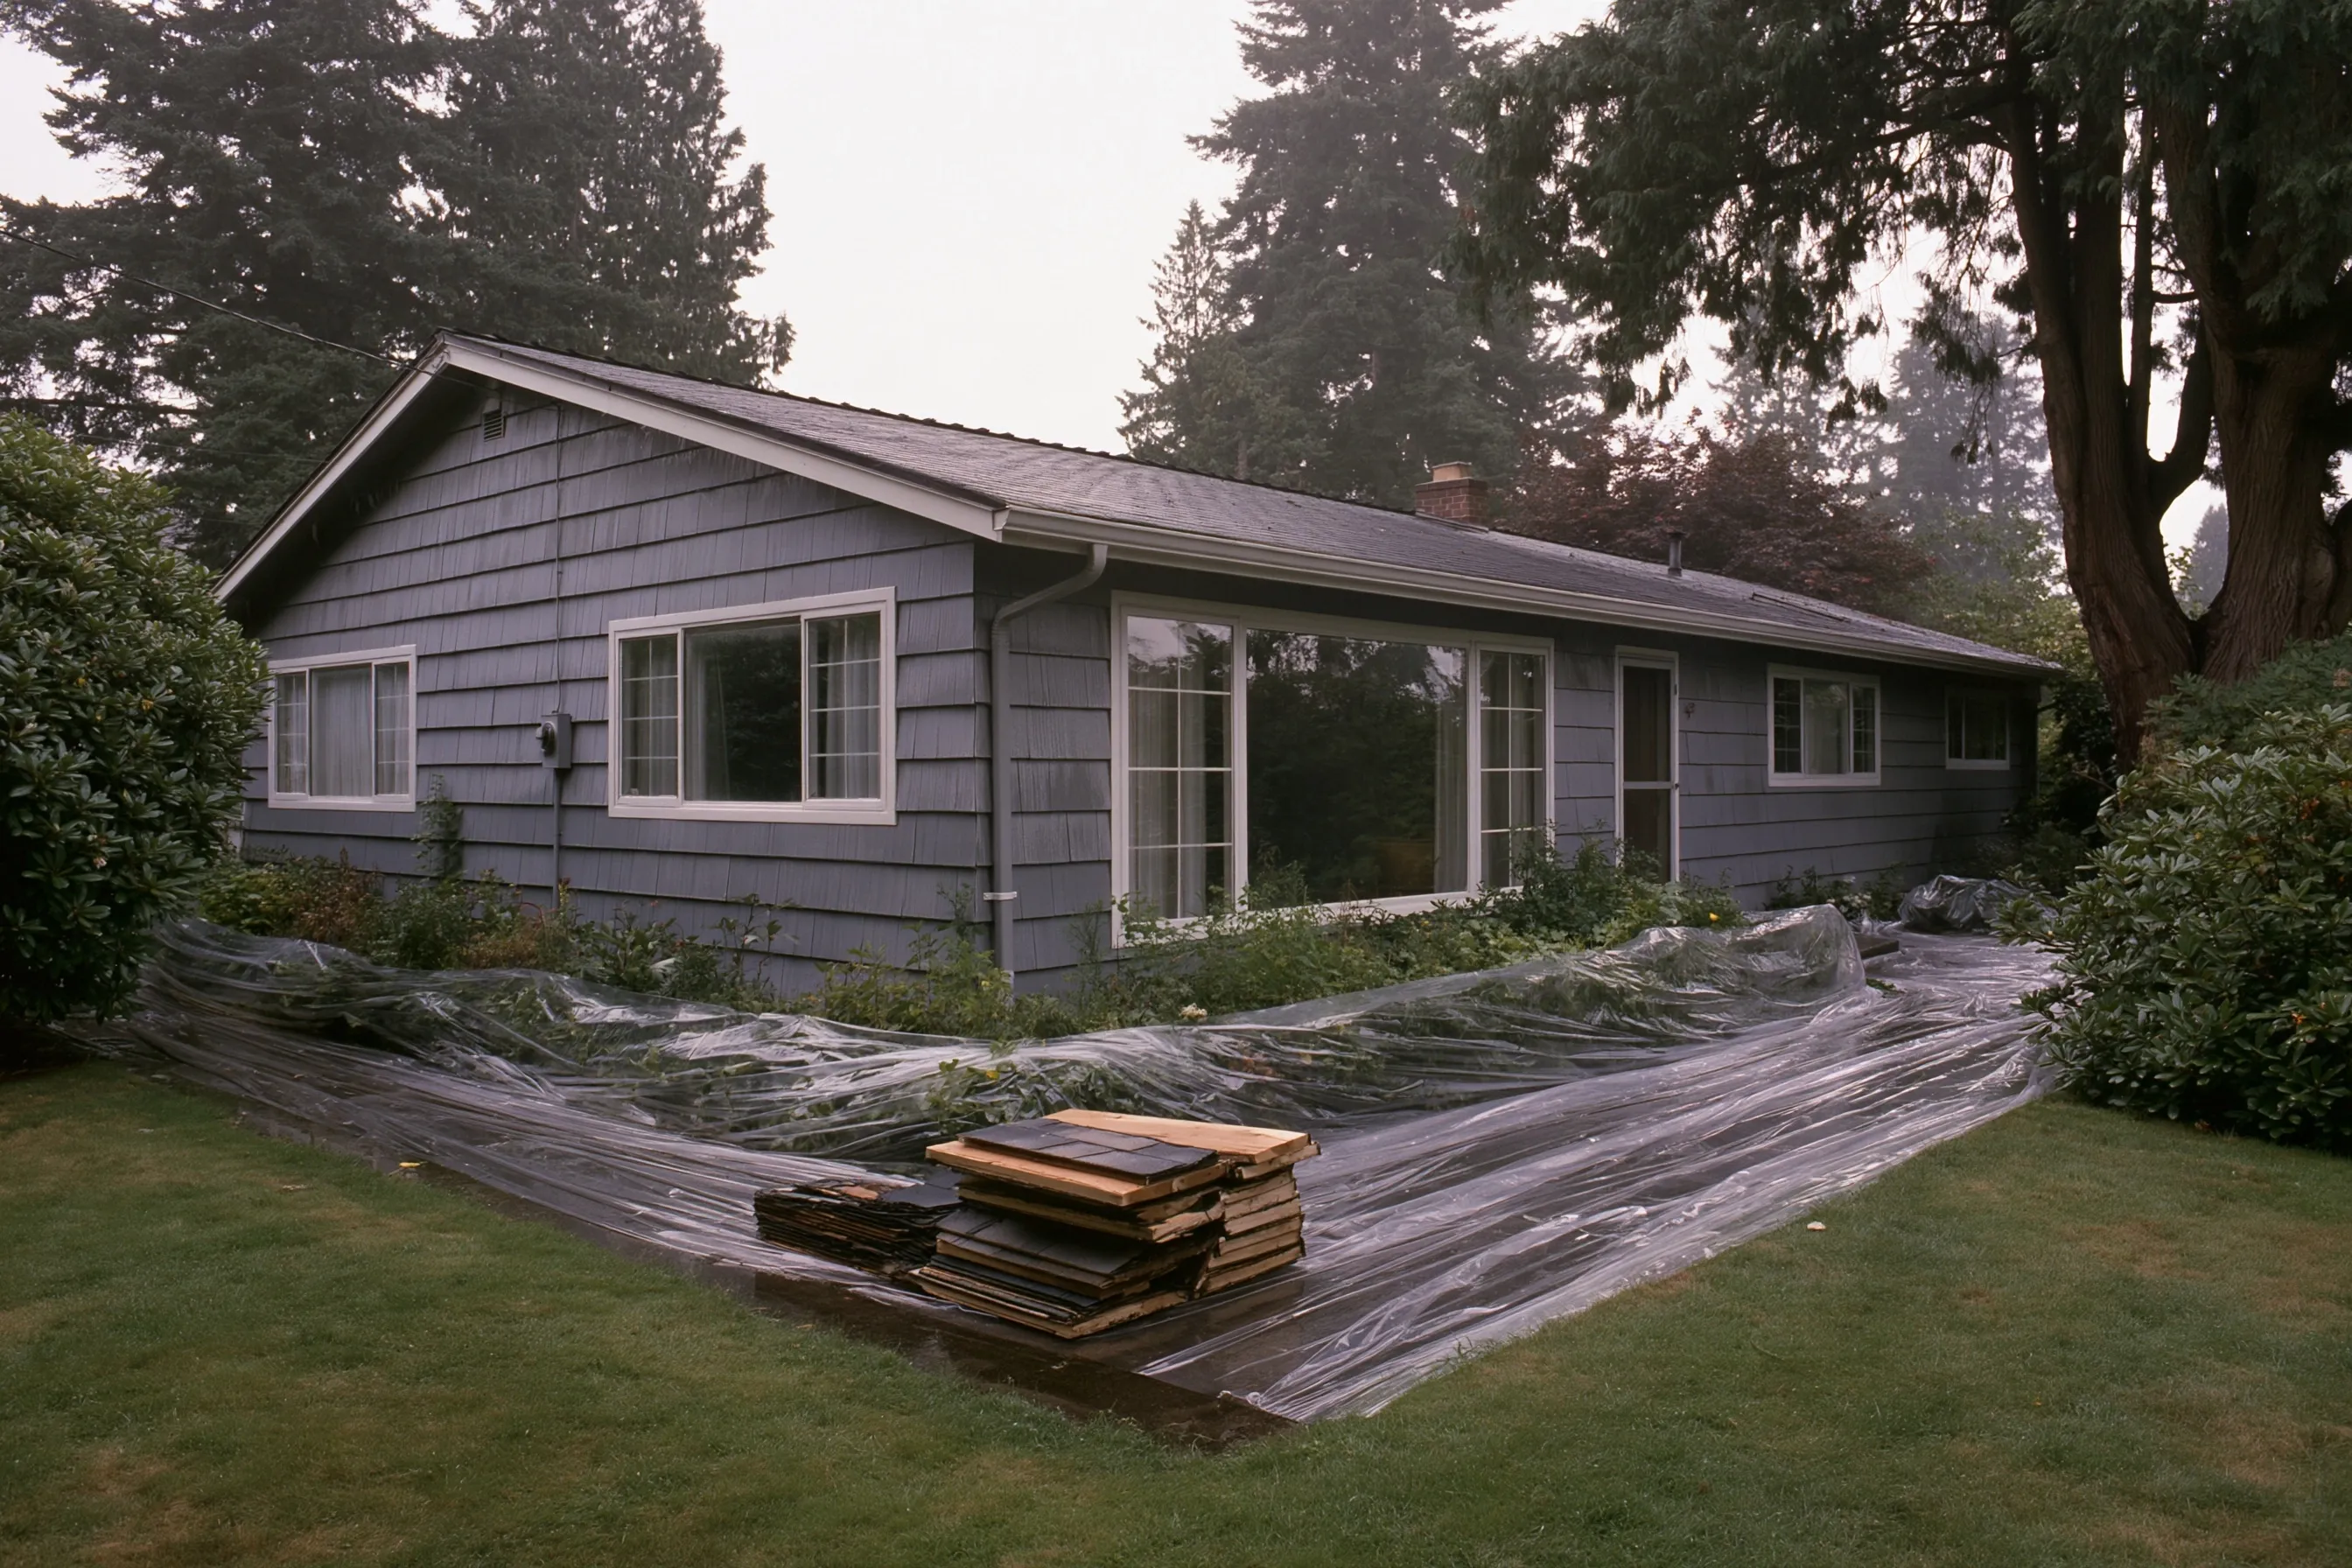
Single-story 1970s home in gray cement shingles with white window trim, its planting beds wrapped in plastic along the wall
Home
1970s one-story house in Federal Way
Original request
Repaint the house; the painter found cracked shingles on the back wall
Testing
A cracked piece from the back wall, tested at the painter’s request: positive
Area
Only the back of the house, roughly 360 sq ft of wall
Agency notice
Filed for the back wall before the crew comes
Timeline
Back wall stripped in two days, re-sided the same week
Cost
$5,300

Scope of work

Plastic over the garden beds and the ground, the back wall shingles wetted and taken off whole, wrapped and hauled, and the beds picked clean. The new back-wall siding and the paint job for the whole house come from other trades.

Project overview

In this example, the owners of a 1970s Federal Way house hire a painter, who refuses to pressure-wash or scrape the gray cement shingles and points out a band of cracked ones on the back wall. A shingle tests positive.

The other walls are sound and can be cleaned by hand and painted. On the back wall alone, each shingle is wetted and unnailed whole once the agency filing is in. That wall gets new siding, and then the whole house is painted.

The goal

The goal is a sound back wall with new siding and the rest of the shingles left whole, ready for one paint job.

Process

  1. Before work Cracked piece to the lab; filing sent; plastic tucked over the rhododendrons.
  2. Day one Shingles wetted and lifted off from the top, stacked on plastic.
  3. Day two The lowest shingles off, bundles wrapped for the truck, every bed searched by hand.
  4. Then New siding on the back wall, then the painter starts on the whole house.

Planning right

  • Power tools break cement shingles. If you must clean them, use a soft brush and a bucket.
  • Cracked shingles can be left alone for a time, but not scraped or broken further.
  • Ask the painter which paint suits cement siding.
  • New siding on one wall should match the shingle reveal of the others when painted.

Get a free quoteMore about asbestos siding and roofing removal

Chewed sections of duct wrap cut out of a crawl space after a rodent problem

Example project

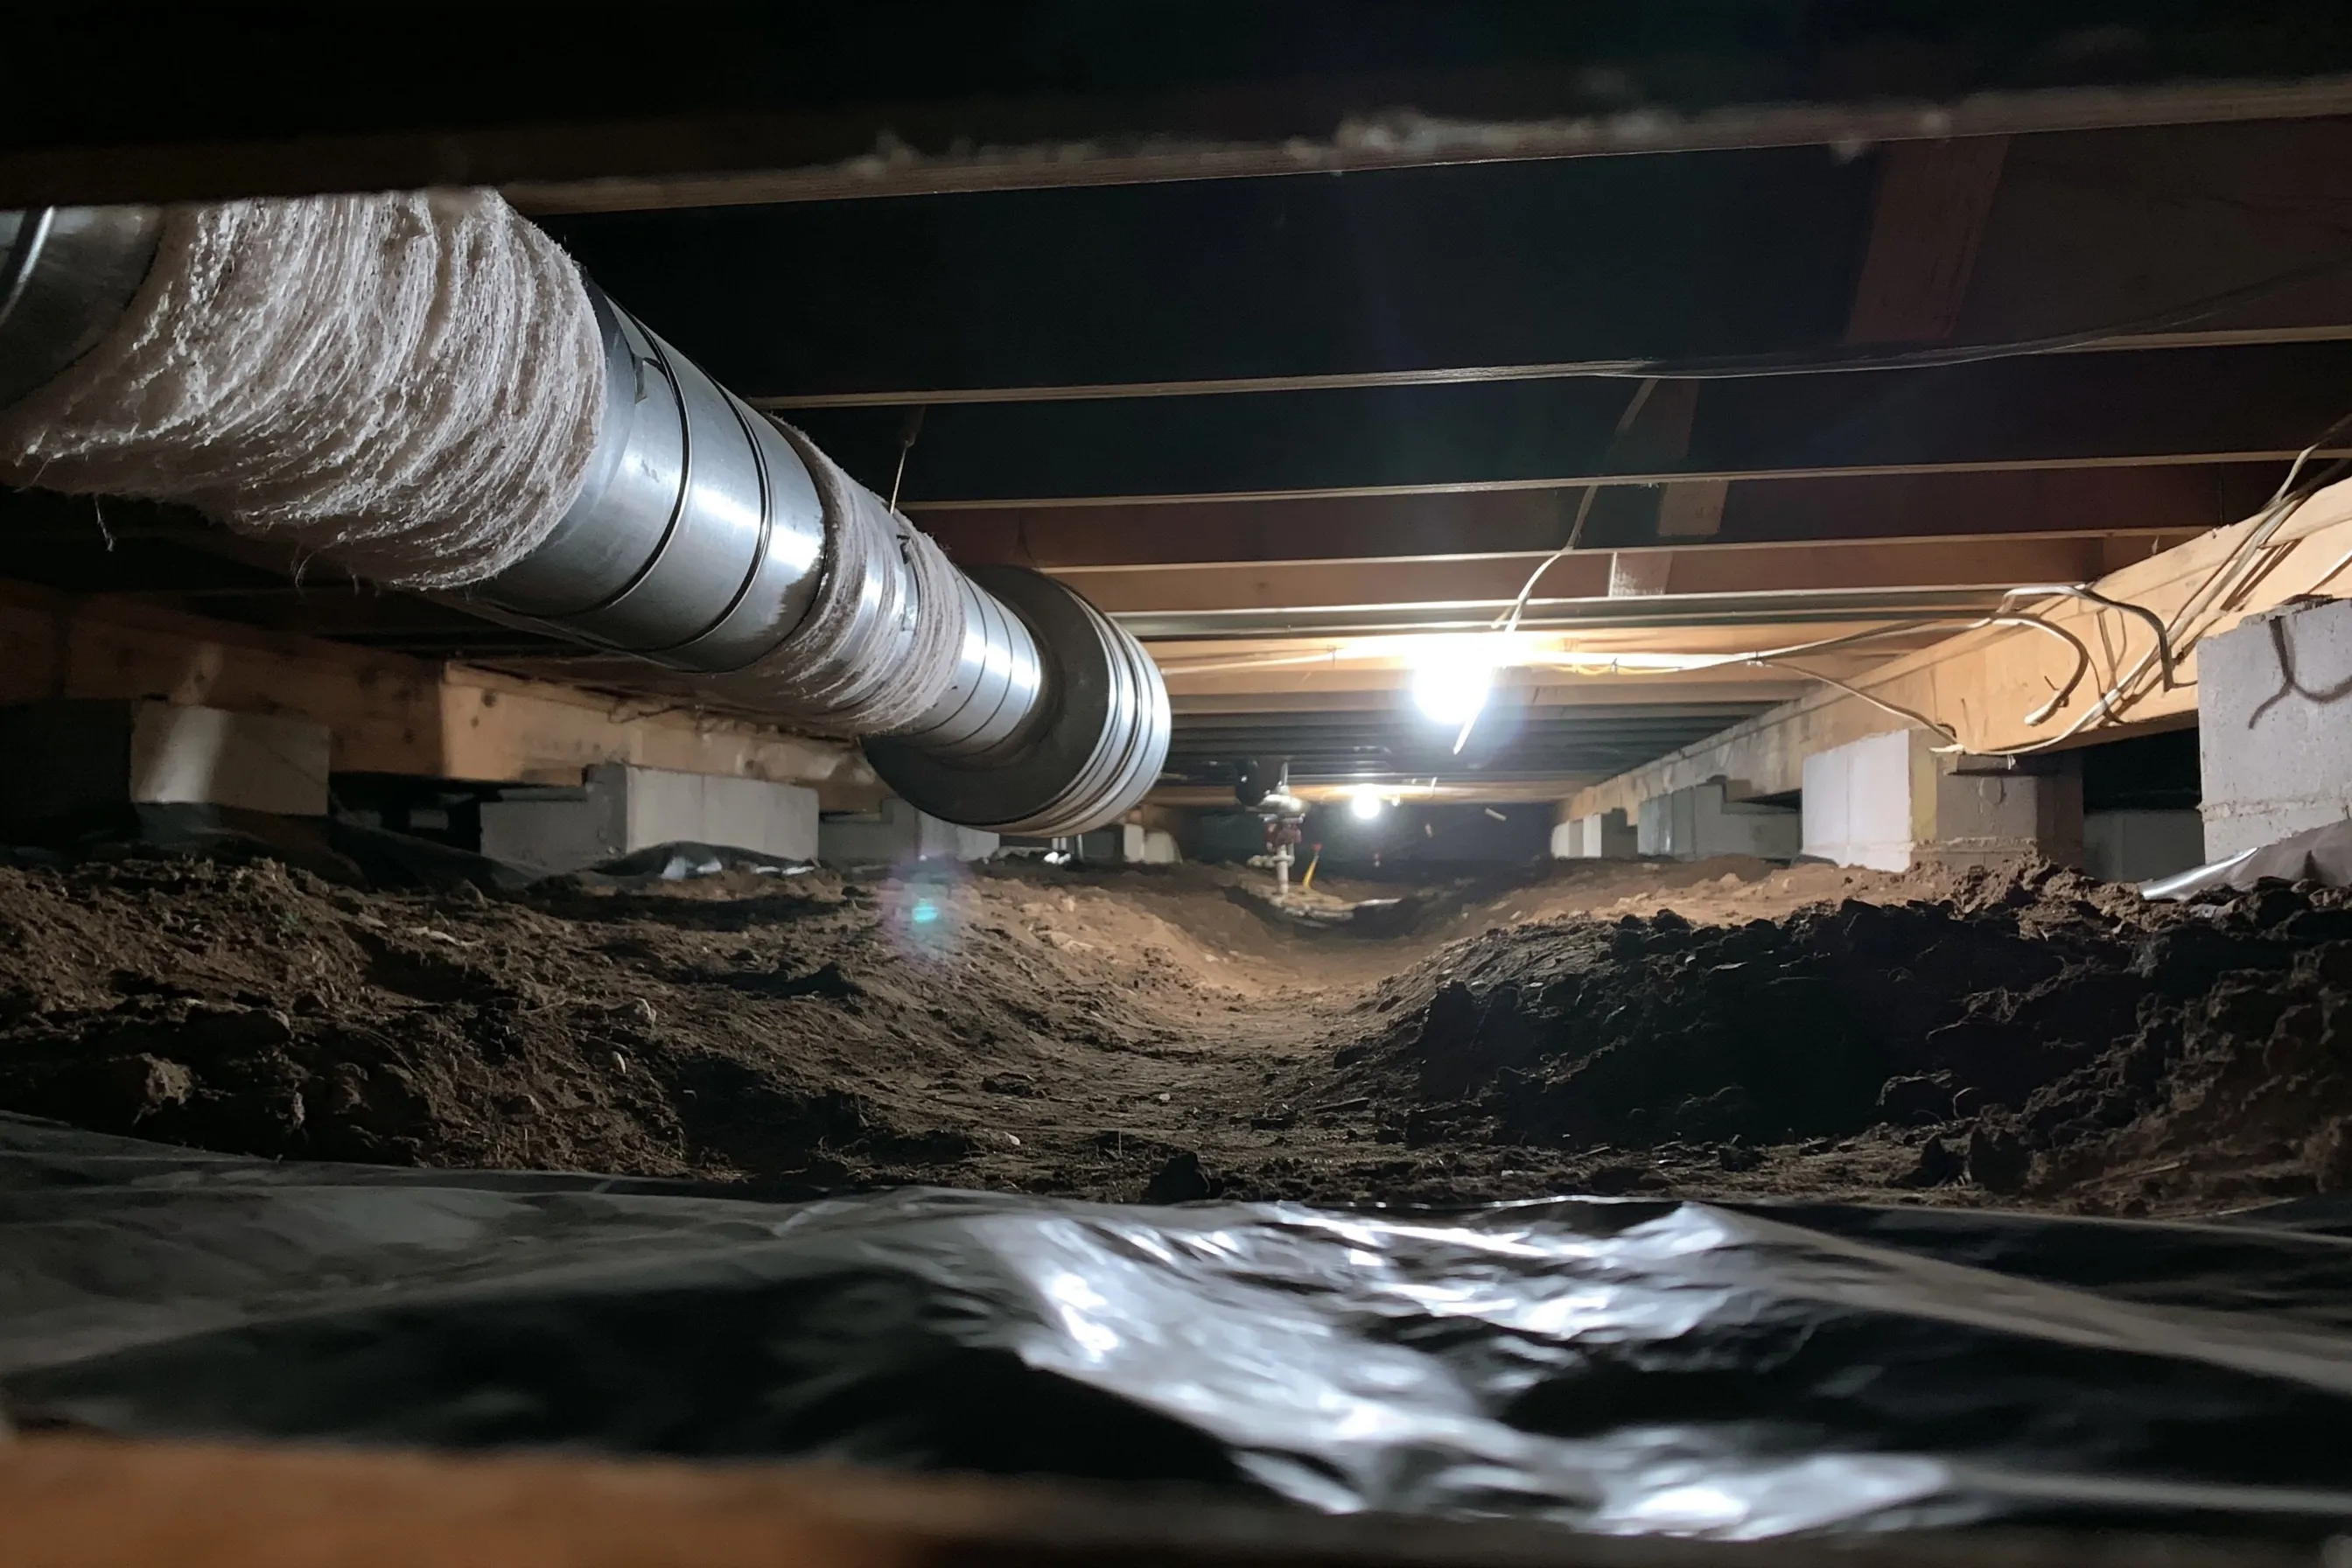
Crawl space with bare dirt under the joists, old round heating ducts in white tape wrapping and a torn black ground cover in front
Home
1950s single-story house in Milton over a crawl space
Original request
Clear out nests and droppings after pest control, keeping the working ducts
Testing
Duct wrapping from under the kitchen, torn and nested in, analyzed and found positive
Material
About 60 ft of chewed and nested wrap, about 140 sq ft, on three runs; the sound wrap beside it stays
Agency notice
Puget Sound Clean Air Agency notified ahead of time, since the wrap is over 48 sq ft
Timeline
Two days under the floor after the pest company seals the entry holes
Cost
$2,600

Scope of work

A work area in the crawl space kept under negative air, the chewed wrap wetted and cut away with the nest material, the cut ends of the sound wrap sealed, the torn ground cover vacuumed where the work ran, disposal and an air test. The pest company and any duct patching are separate contracts.

Project overview

In this example, the owners of a 1950s house in Milton hear mice under the floor. The pest company finds nests inside the old duct wrap, which is chewed and torn on three of the runs. A test of the wrap shows asbestos, so the pest company will not go on until it is dealt with.

The ducts still work, so only the chewed lengths come out, about 60 ft or roughly 140 sq ft of wrap, with the nests inside them. At that size the notice to Puget Sound Clean Air Agency goes in first. The sound wrap stays, its cut ends sealed, and a heating contractor patches the bare duct.

The goal

The goal is a crawl space with no chewed wrap and no nests left, and the sound ducts still in place.

Process

  1. Before work Wrap sampled; the chewed runs marked; notice filed; the pest company seals the outside holes.
  2. Day one Access sealed, air unit running, the chewed wrap wetted and cut away with its nests.
  3. Day two Cut ends sealed, the floor vacuumed along each run, air samples, and the hatch is unsealed.
  4. Then The heating contractor patches any holes in the bare duct.

Planning right

  • Do not clear nests out of torn wrap yourself. Fibers and droppings go into the air together.
  • Keep the hatch shut and pets out until the test is done.
  • Ask the pest company to check the sound wrap again after a month.
  • Put the passed air samples in the folder with the pest company’s report.

Get a free quoteMore about asbestos insulation removal

Survey and floor tile removal before a family room remodel

Example project

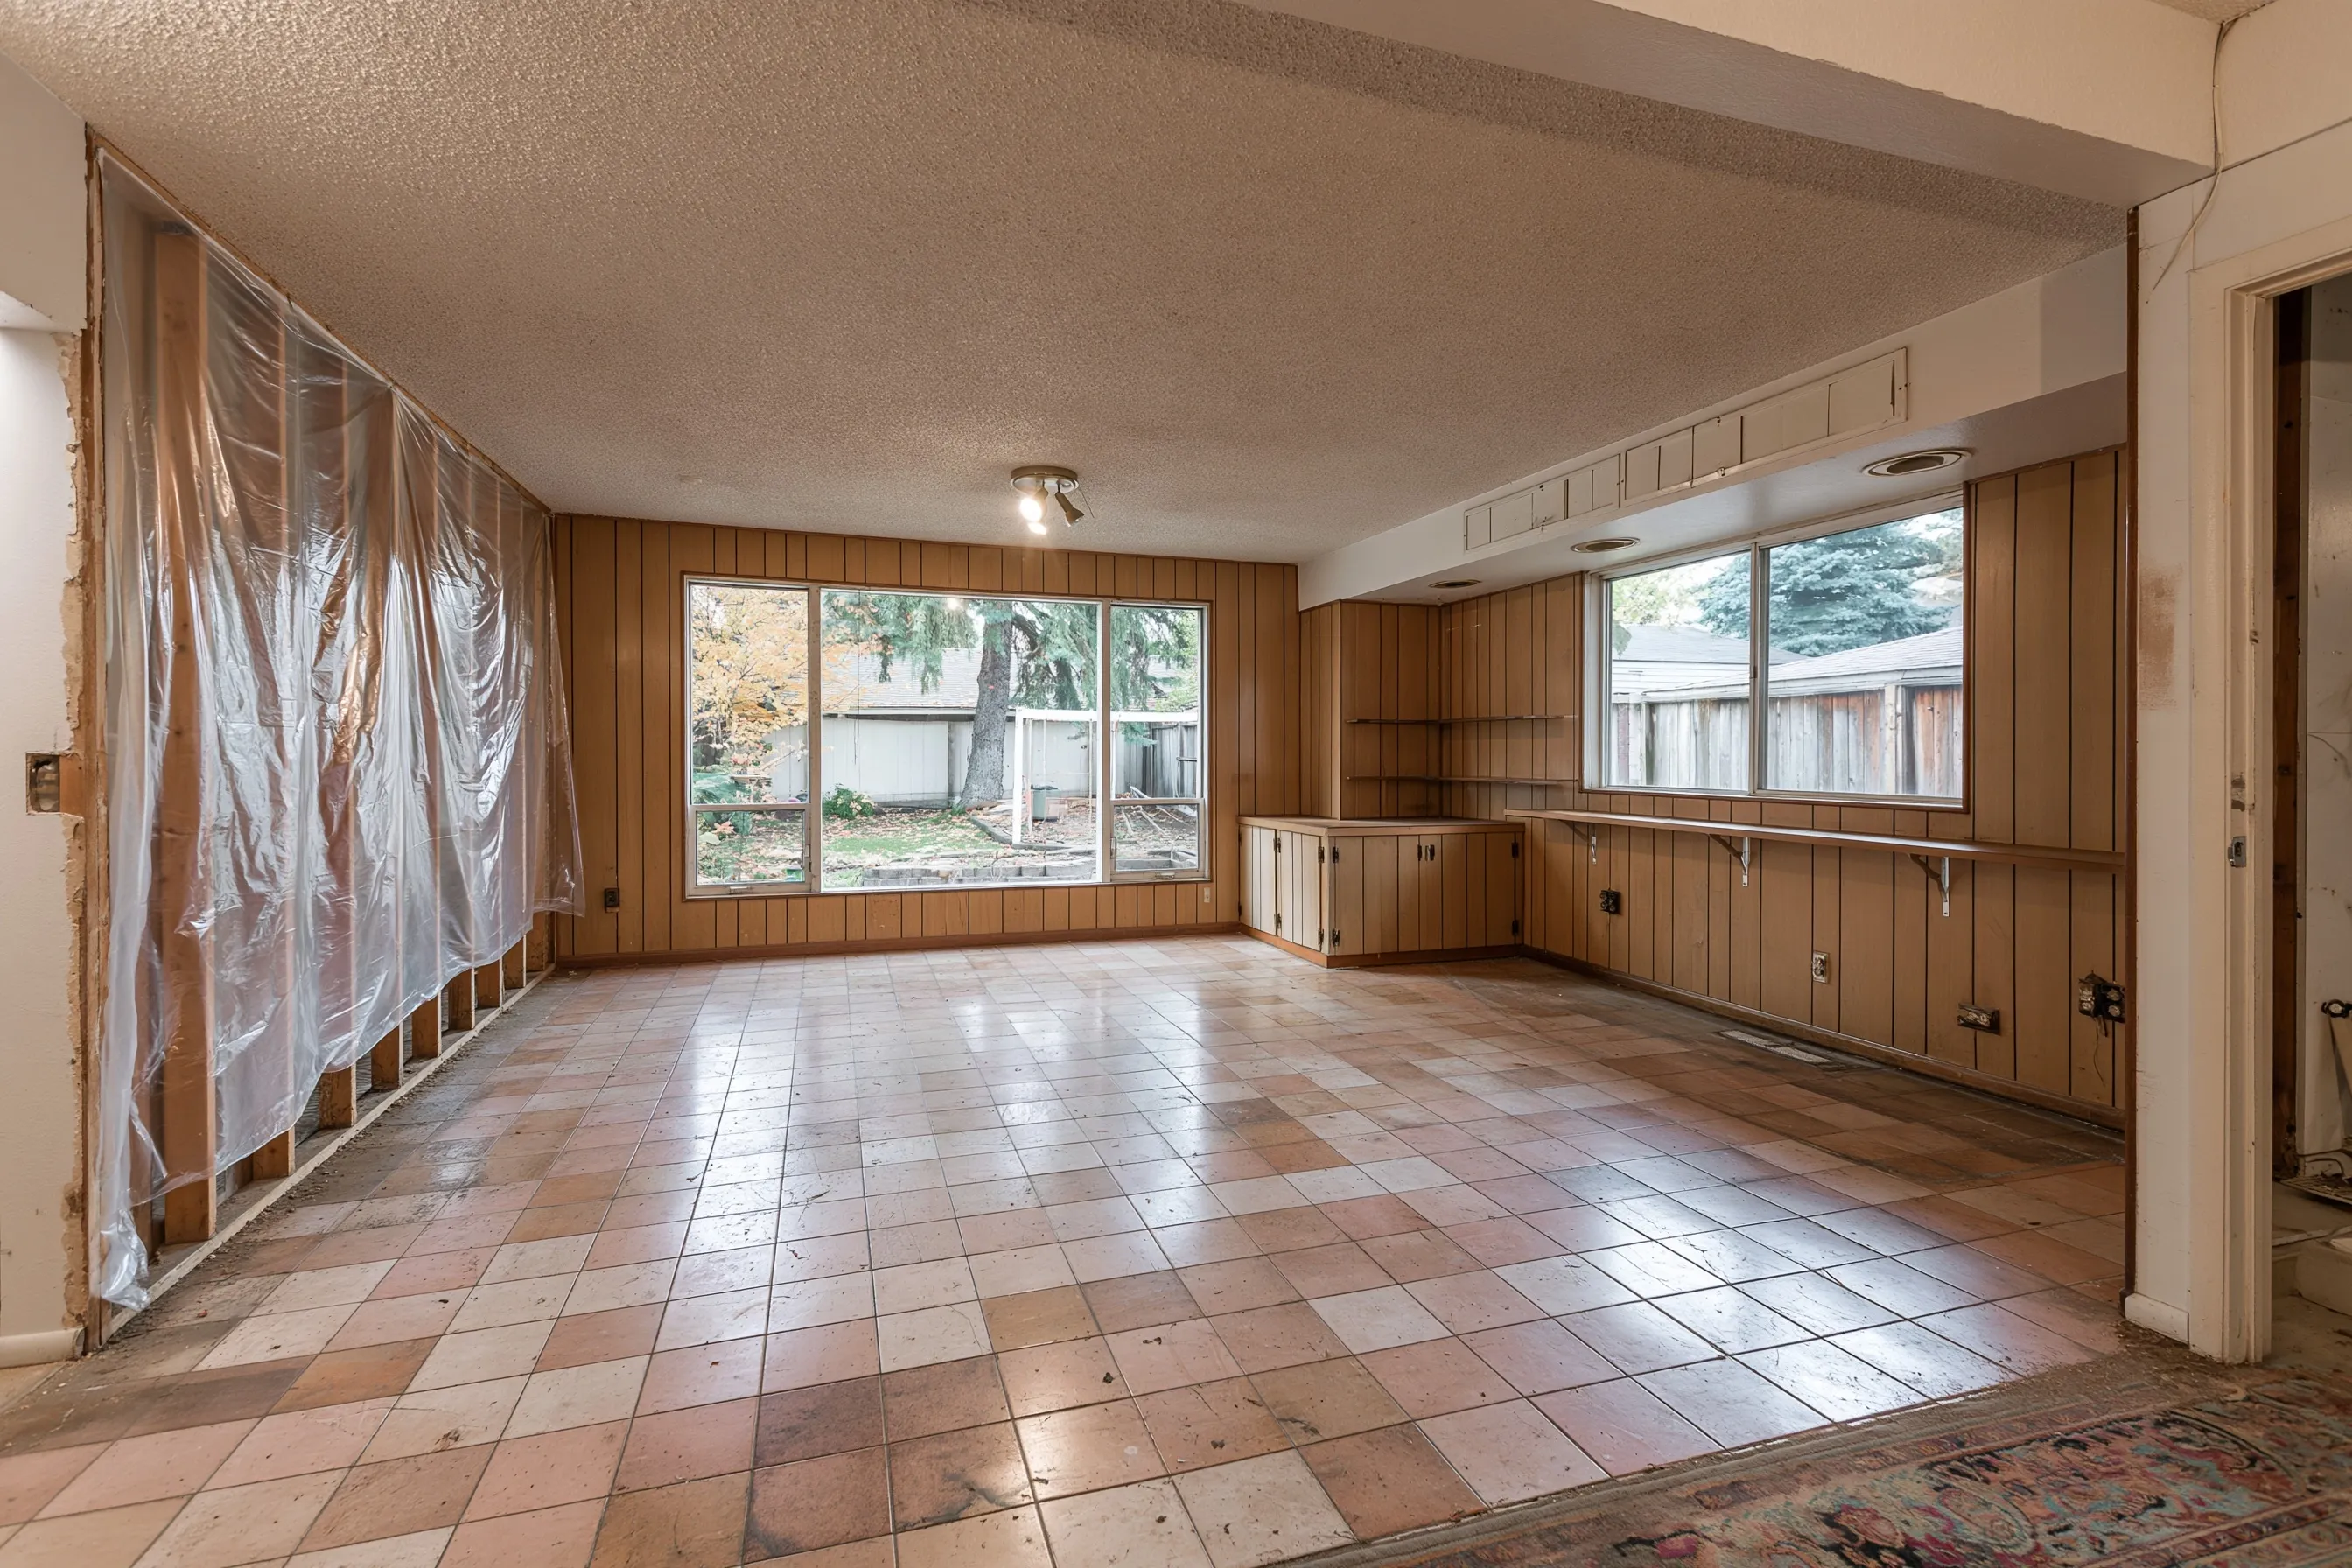
Lower-level rec room with big windows at ground level, a textured ceiling, worn square floor tiles and sheeting partly hung
Home
1960s split-entry house in Federal Way with a daylight basement
Room
Lower family room, about 280 sq ft, with big ground-level windows and a textured ceiling
Original request
A remodel of the lower family room with new lights, flooring and a wet bar
Testing
Ten samples: ceiling, floor tile, glue and the wallboard behind the paneling
Found
Asbestos in the floor tile and its adhesive only
Work
About 280 sq ft of floor tile and adhesive removed inside plastic
Timeline
Lab answer in four days; the floor is out in two more
Estimated removal cost
$3,600

Scope of work

The walls sheeted and the stair closed off, the squares soaked and pried up whole, the glue hand-scraped, waste bagged and hauled, then a HEPA pass over the concrete. The inspector and the remodeler send their own bills.

Project overview

In this example, the owners of a 1960s split-entry house in Federal Way want to remodel the daylight basement family room. Before the remodel is priced, the ceiling texture, the old floor tile, its black adhesive and the wallboard behind the wood paneling are all sampled.

Only the floor tile and adhesive come back positive. The ceiling texture and the walls are clear, so the remodeler can scrape, cut and patch them the usual way. The floor comes up first, whole and wet, and no agency notice is needed for vinyl tile kept whole.

The goal

The goal is a family room where only the floor needed asbestos work, ready for the remodel with the results in hand.

Process

  1. Survey visit Ten samples taken in about an hour; results and a report about four days later.
  2. Before work Floor removal scheduled ahead of the remodel; the room emptied.
  3. Day one Sheeting hung, half the room’s squares soaked and lifted.
  4. Day two Adhesive scraped, slab cleaned and checked; the remodeler takes over.

Planning right

  • A clear result is as useful as a positive one. It tells the remodeler what can be handled normally.
  • Sample each layer of the floor, including any tile under carpet.
  • Owner-occupants may sample their own house for a remodel, but a professional report is easier to share.
  • Give the report to the remodeler before they price the job.

Get a free quoteMore about asbestos removal before a remodel or tear-down

Survey of a church hall before a new kitchen and restrooms

Example project

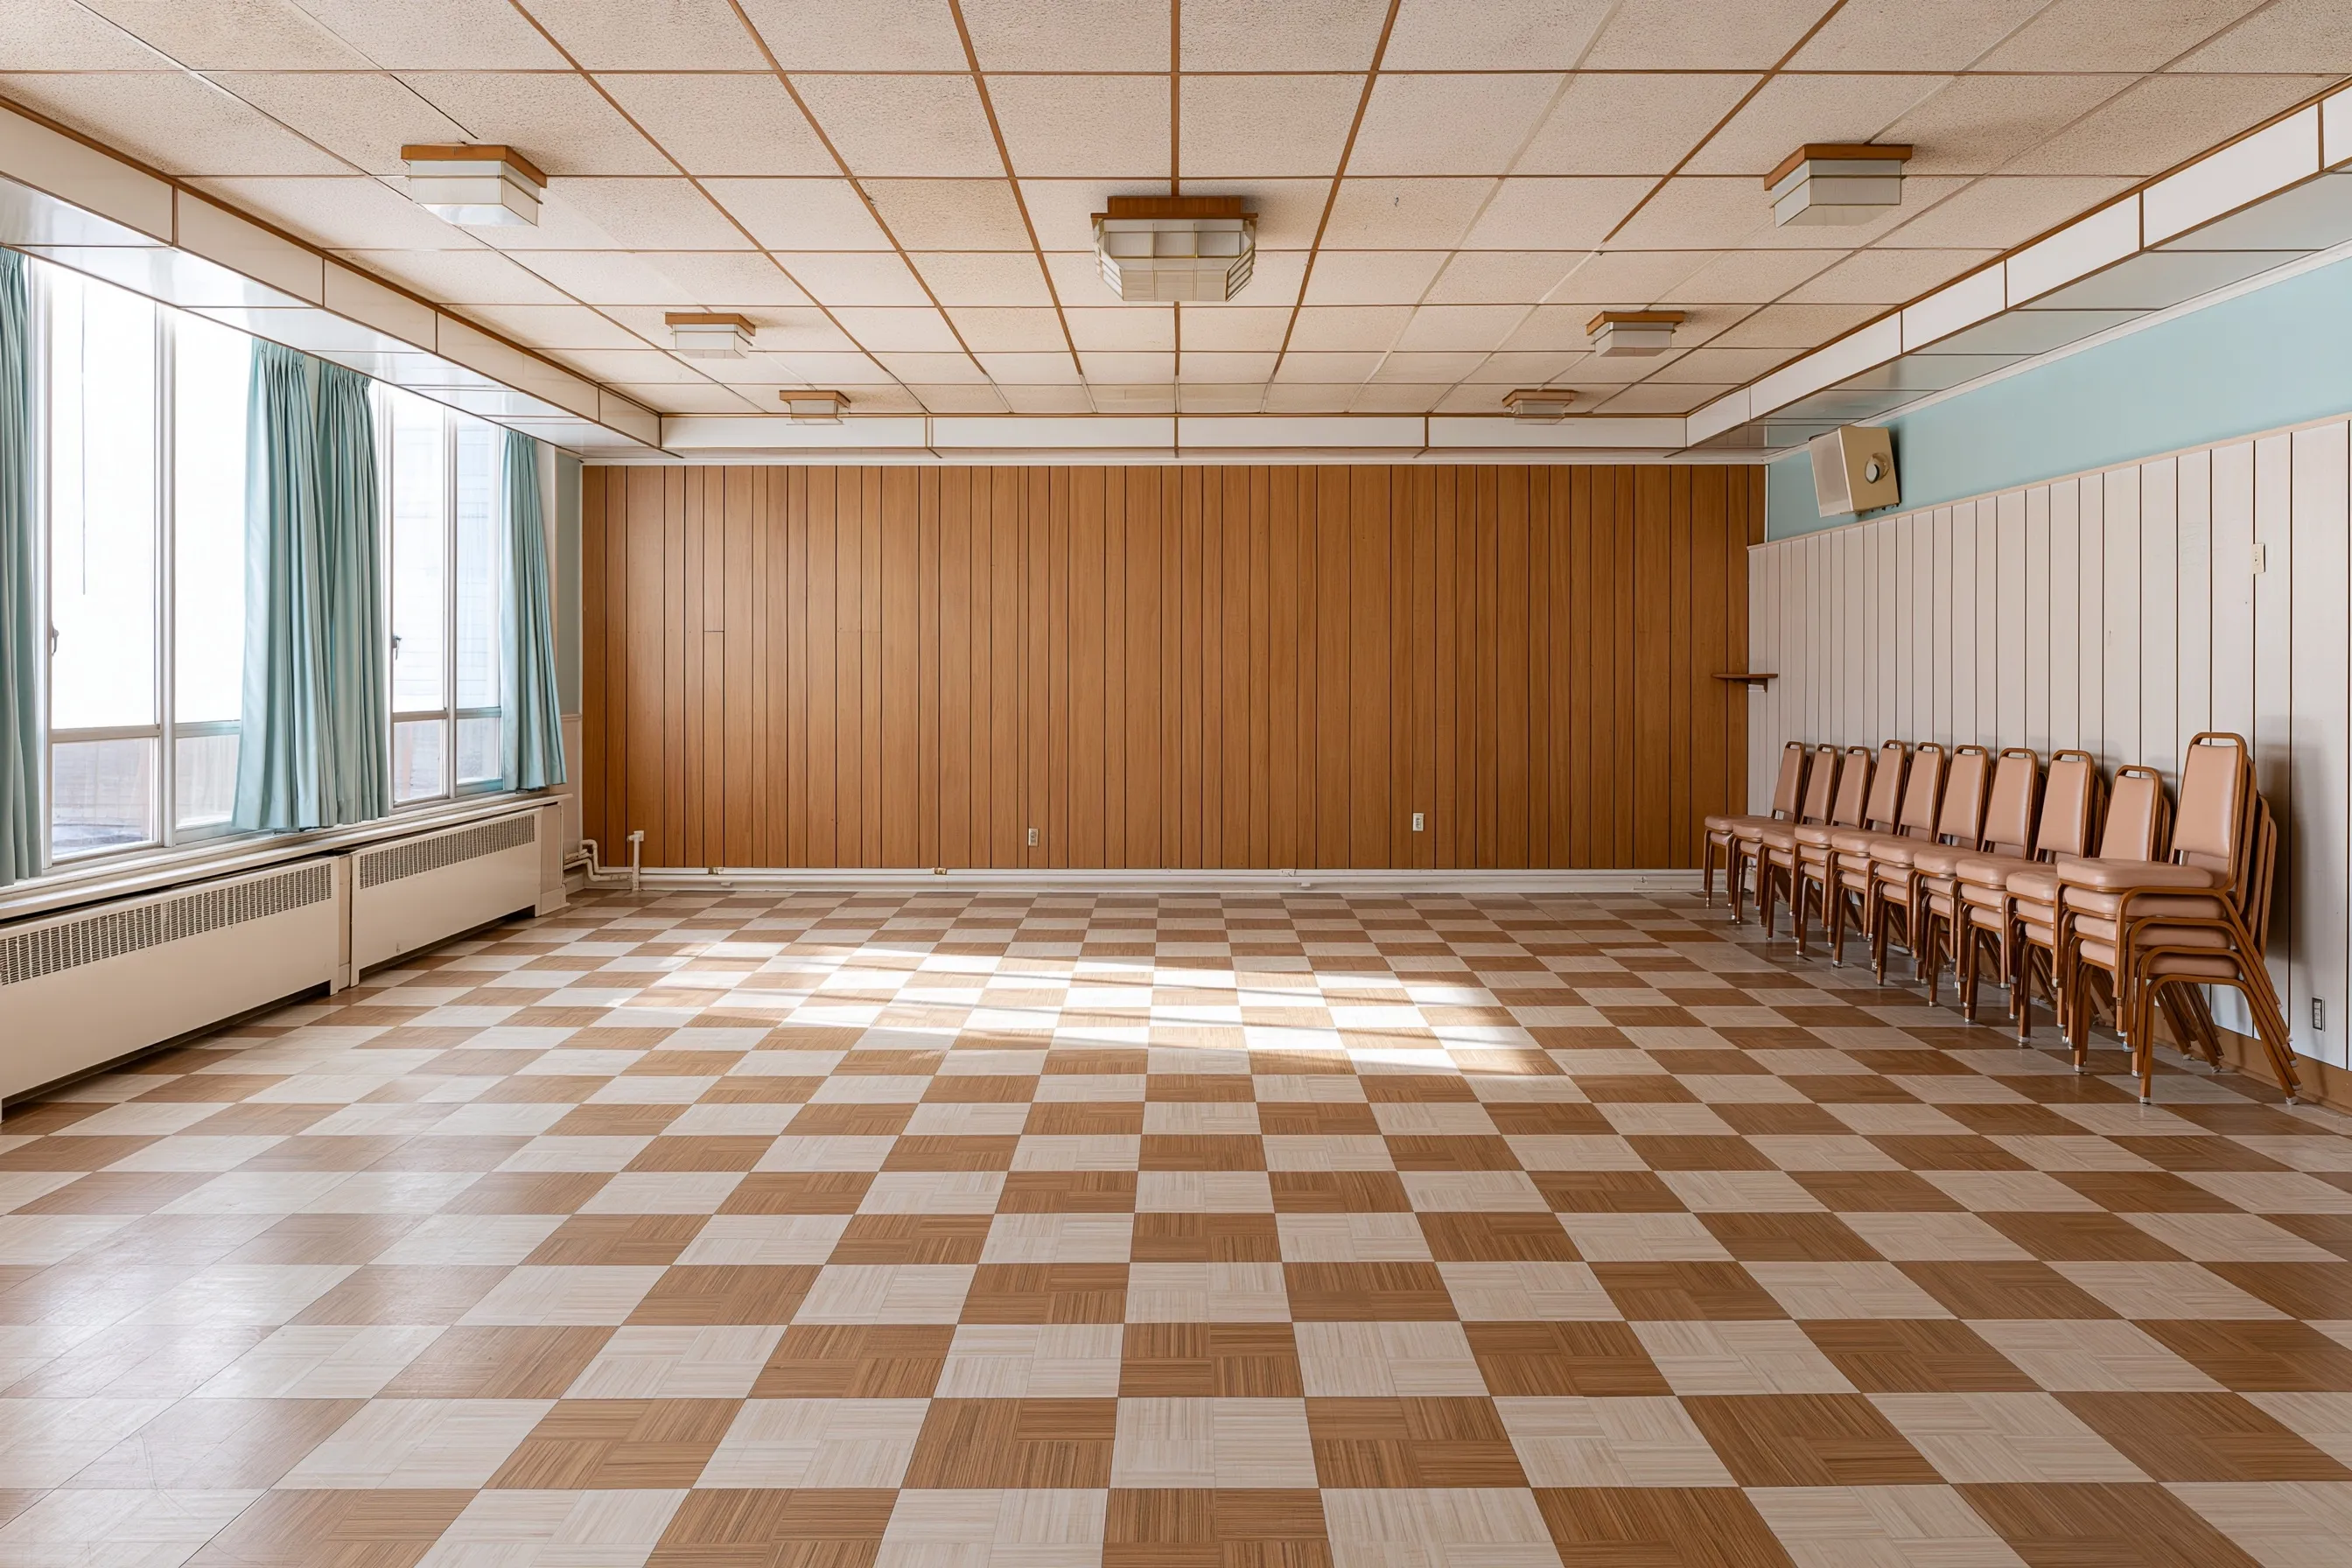
Bare 1960s meeting hall with chairs stacked at the side, a two-tone checkerboard tile floor and a ceiling of acoustic panels
Building
1960s church fellowship hall in Fife, about 2,400 sq ft
Original request
A new kitchen and accessible restrooms off the hall
Testing
Hall, kitchen and restrooms surveyed by an accredited inspector, 25 or so samples
Found
Asbestos in the checkerboard floor tile and the kitchen sink undercoating
Clear
The lay-in ceiling panels and the drywall in both restrooms
Timeline
Sampled on a weekday morning, results by the following Friday
Estimated survey cost
$2,600

Scope of work

A walk-through with the plans, samples from every material the kitchen and restroom work will touch, lab analysis and a written report for the church and its builder. The two positives get a removal price once the report is read.

Project overview

In this example, a church in Fife is adding a new kitchen and accessible restrooms off its 1960s fellowship hall. A building that is not a house needs a survey by an accredited inspector before the work, so the hall, kitchen and restrooms are sampled.

The checkerboard floor tile and the undercoating on the old kitchen sink are positive. Nothing in the ceiling panels or the restroom drywall shows up. The builder can now plan the removal of those two materials into the schedule.

The goal

The goal is a survey that lets the church schedule the new kitchen and restrooms with the asbestos work known up front.

Process

  1. Visit The inspector walks the rooms with the builder’s drawings, then samples through the morning.
  2. Within a week A results table and a marked-up floor plan go to the church board.
  3. Next Removal of the tile and the sink priced and scheduled.
  4. Then Kitchen and restroom construction starts after the removal clears its air test.

Planning right

  • Bring the drawings to the survey so every planned opening is sampled.
  • Hall floors often run under kitchen cabinets. Ask for samples there too.
  • A copy in the church office spares the next committee from a second survey.
  • Plan the work around services and events. A sealed hall cannot be used.

Get a free quoteMore about commercial asbestos abatement

Tile under the living room carpet before a nailed hardwood floor

Example project

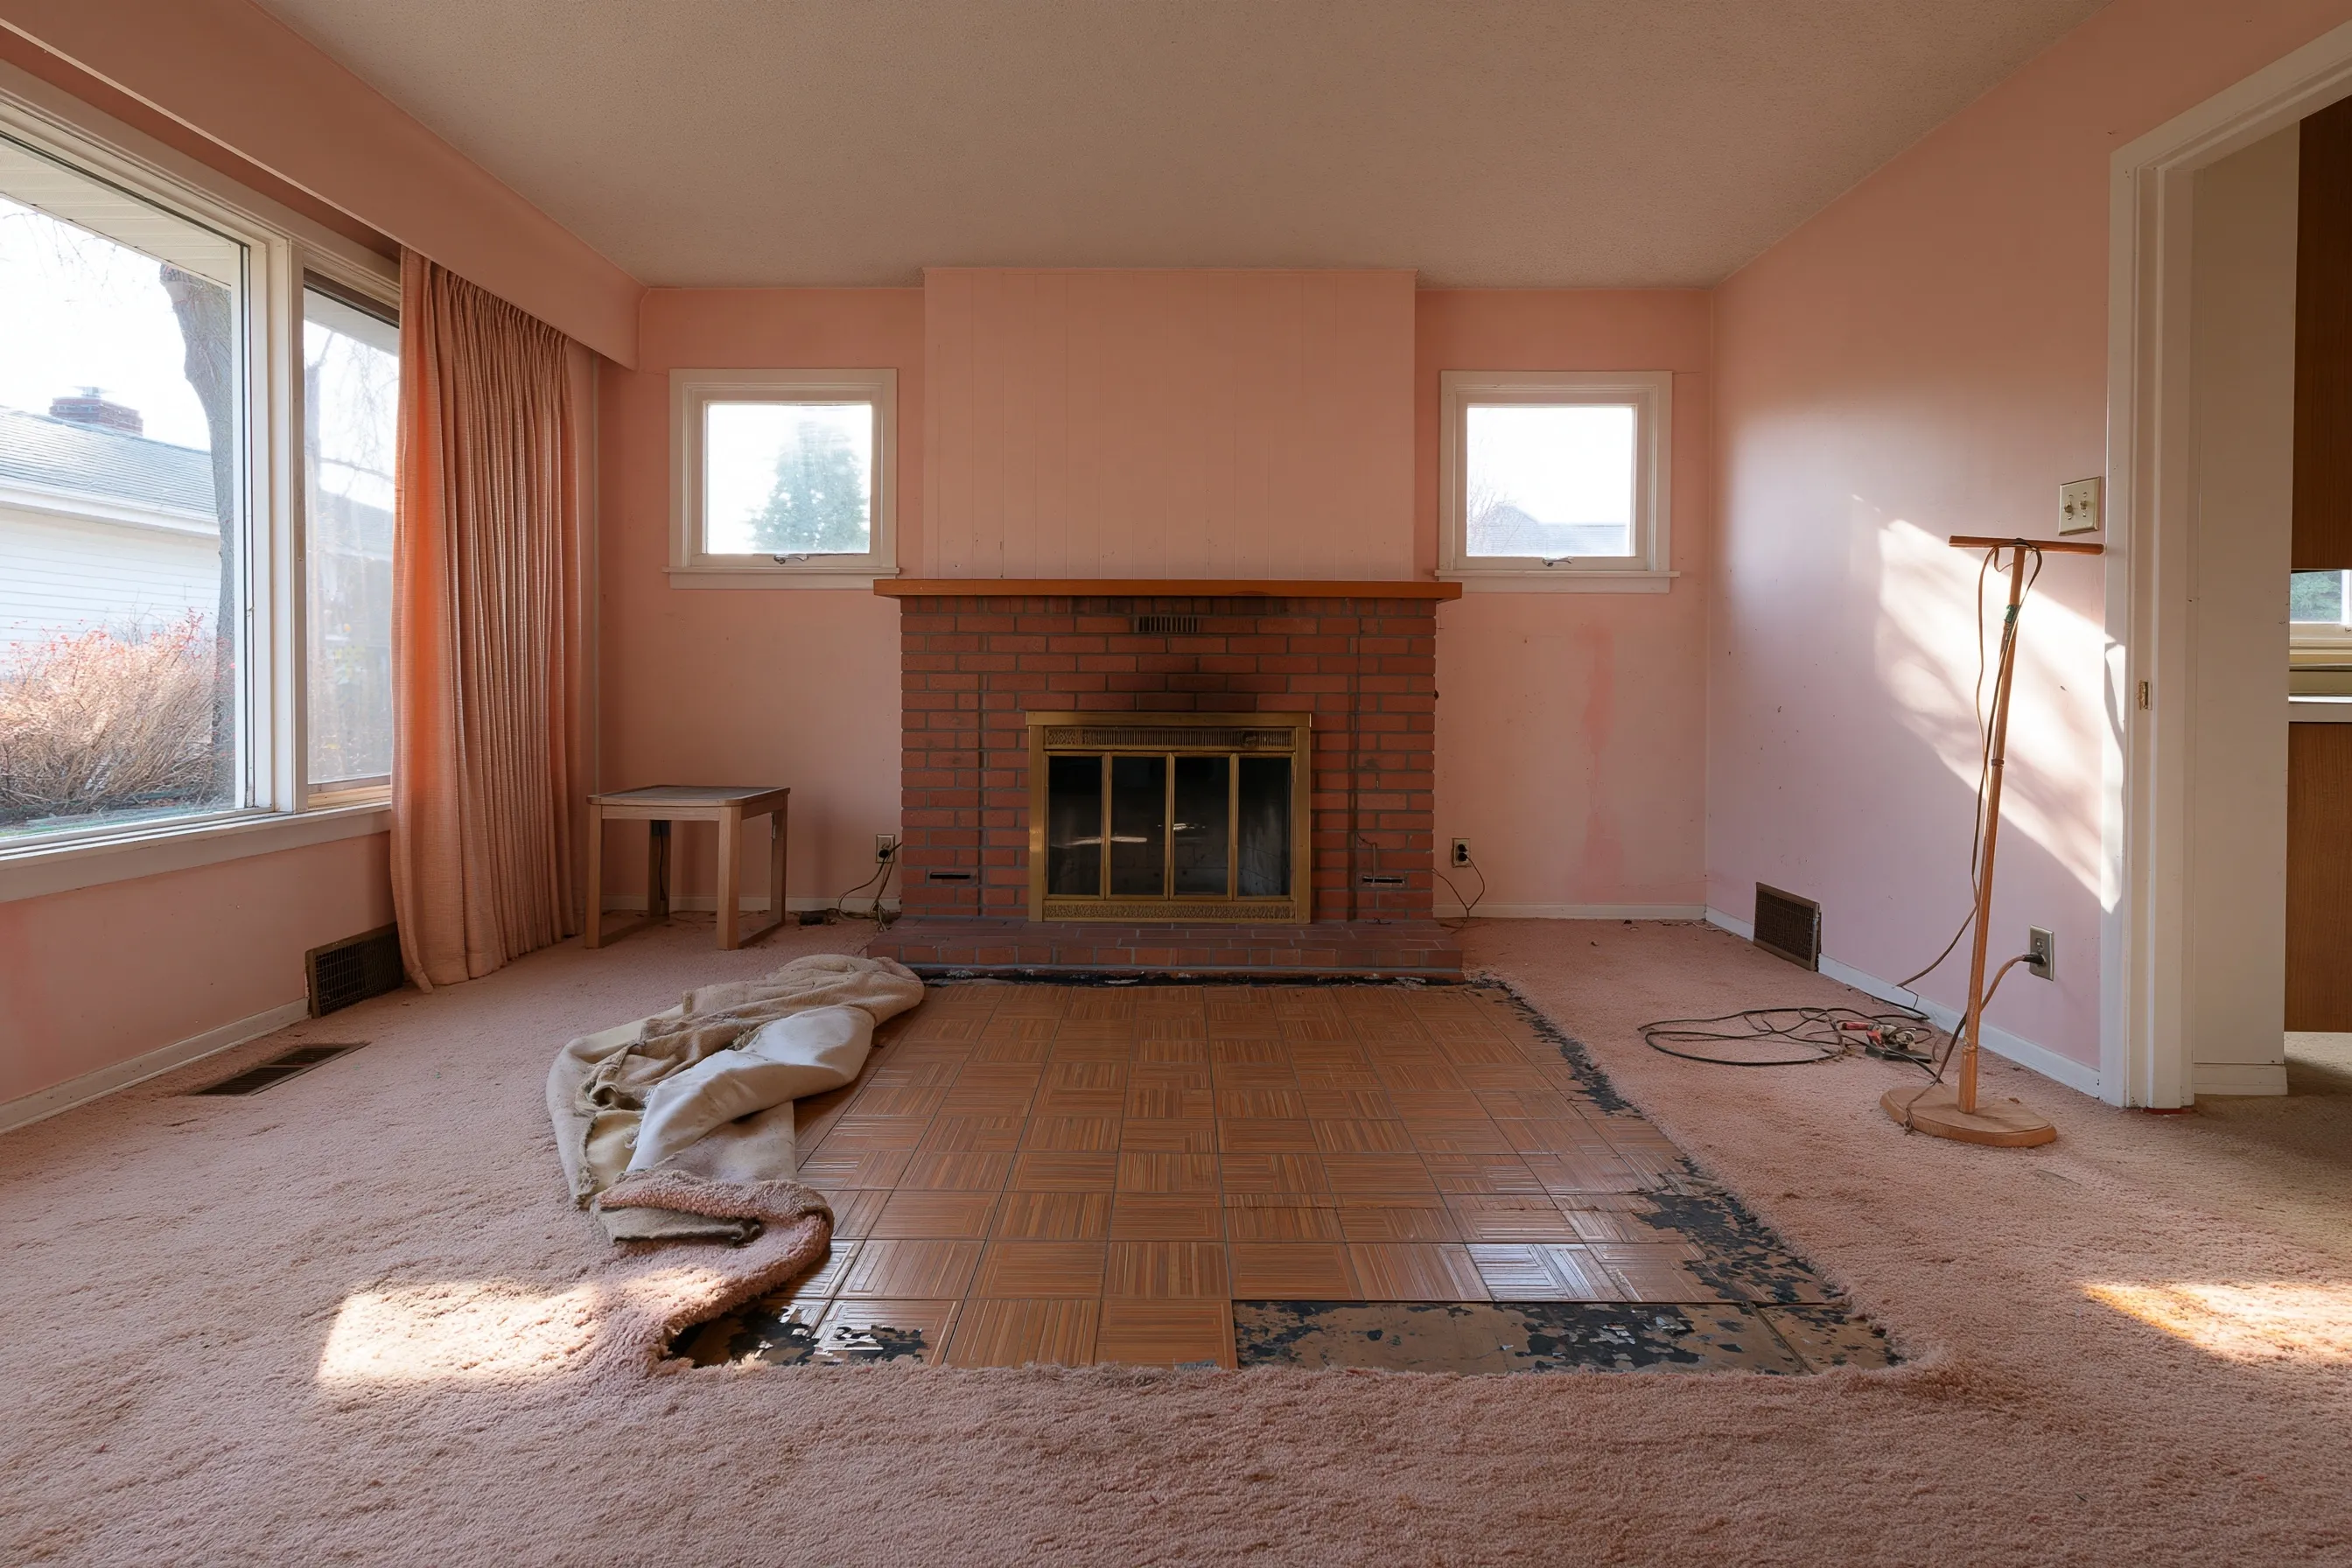
Living room with a brick fireplace, a square of carpet cut out and rolled aside to show vinyl floor tiles and black adhesive
Home
1960s single-story house in Federal Way
Original request
Nail-down hardwood in the living room in place of the carpet
Testing
Tile and glue found under a cut-back square of carpet by the fireplace; the lab says both contain asbestos
Area
About 260 sq ft of living room floor
Agency notice
No filing, because the squares stay whole
Timeline
Carpet out first, then a day or two on the tile
Cost
$3,900

Scope of work

Plastic at the doorways, the squares soaked and lifted in one piece, the adhesive scraped from the boards beneath, sealed bags, disposal and a vacuum and damp wipe of the subfloor. Pulling the carpet and installing the hardwood are on the flooring company’s quote.

Project overview

In this example, the owners of a 1960s house in Federal Way cut back a square of living room carpet by the fireplace and find vinyl tile and black adhesive. They want nail-down hardwood, and the nails would crack the tile, so floating the new floor over it is not an option. Both layers, squares and glue, are positive.

Even with no filing required, the squares are soaked and lifted by hand rather than chipped. The adhesive is scraped off, never sanded, and the subfloor is left clean for the hardwood installer.

The goal

The goal is a clean plywood subfloor ready for the hardwood nailer, with no tile or glue left behind.

Process

  1. Before work Tile and adhesive samples to the lab; the carpet and pad taken out.
  2. Day one Doorways sheeted, every square soaked and lifted, bags filled and sealed.
  3. Day two The plywood scraped free of glue, then vacuumed and wiped for the installer.
  4. Then Hardwood goes down once the installer is happy the plywood is flat.

Planning right

  • Nailed hardwood cannot go over old tile, because the nails crack it.
  • Take the carpet out gently. Ripping it up can chip the tile underneath.
  • Ask whether the subfloor will be flat enough for hardwood once the tile is off.
  • Check the closets under the same carpet for a few more squares.

Get a free quoteMore about asbestos floor tile and mastic removal

Request a free asbestos removal quote

We recommend calling, but do feel free to contact us using this form. We'll get back to you with a free, personalized quote or additional questions as soon as possible. We're here to help.

Call (253) 785-9119

Call (253) 785-9119